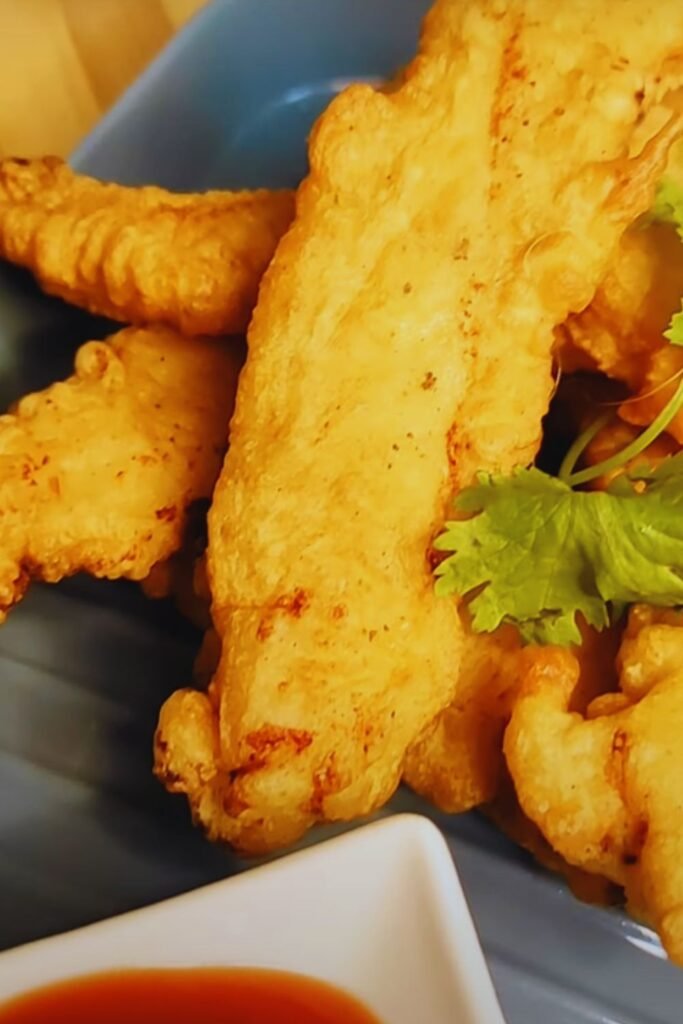
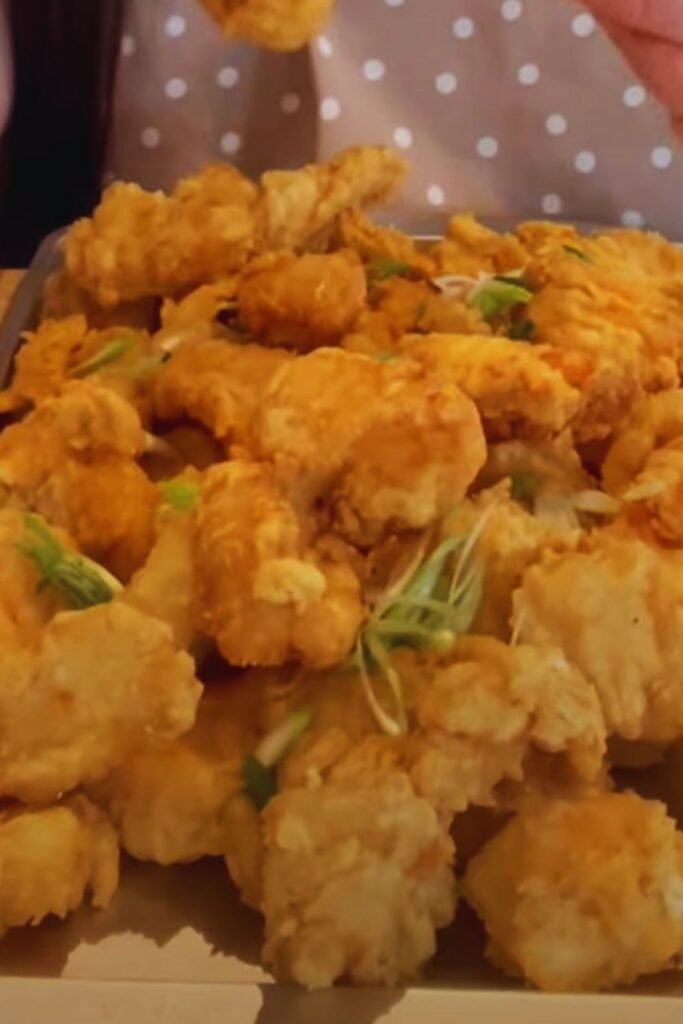
There’s something magical about biting into perfectly crispy tempura—that distinctive crackle as your teeth break through the airy, golden batter to reveal juicy chicken within. After years of trial and error in my home kitchen and studying under a Japanese chef during my culinary adventures, I’ve finally mastered the technique for creating restaurant-quality chicken tempura that’s light as air and crispy as can be.
Many home cooks shy away from tempura, believing it’s too difficult or messy to attempt. I once felt the same way! But I’m here to tell you that with the right techniques and a few crucial tips, you can create tempura that rivals your favorite Japanese restaurant—without the intimidation factor.
In this guide, I’ll walk you through every step of creating authentic Japanese chicken tempura that’s delicately crisp with absolutely no greasiness. I’ll share the secrets to achieving that characteristic light, lacy batter that Japanese tempura is famous for, and help you avoid the common pitfalls that lead to heavy, soggy results.
The History and Significance of Tempura
Before diving into the recipe, let’s appreciate the rich history behind this beloved dish. Contrary to what many believe, tempura isn’t an ancient Japanese creation—it was actually introduced to Japan by Portuguese missionaries in the 16th century. The word “tempura” derives from the Latin “tempora,” referring to the period of Lent when Catholics abstained from meat.
The Japanese embraced this cooking technique and transformed it into an art form. Traditional tempura was often served as street food in Tokyo (then called Edo), but eventually evolved into a sophisticated dish featured in high-end restaurants where tempura masters spend decades perfecting their craft.
What distinguishes Japanese tempura from other fried foods is its characteristic lightness. Unlike heavy batters that absorb oil, proper tempura batter creates a delicate, crisp shell that protects the ingredients while allowing their natural flavors to shine through.
Essential Ingredients for Perfect Chicken Tempura
The beauty of tempura lies in its simplicity, but each ingredient plays a crucial role in achieving that perfect crispness.
For the Chicken:
- 1 pound (450g) boneless, skinless chicken breasts or thighs
- ¼ teaspoon salt
- ¼ teaspoon white pepper
- 1 tablespoon sake (optional but recommended)
For the Batter:
- 1 cup (120g) cake flour or all-purpose flour
- 1 tablespoon cornstarch
- 1 large egg, very cold
- 1 cup (240ml) ice-cold water
- 1 tablespoon ice cubes
For Frying:
- 4-6 cups (1-1.5 liters) vegetable oil with high smoke point (canola, peanut, or rice bran oil)
For Serving:
- Tentsuyu dipping sauce (recipe below)
- Grated daikon radish
- Shredded cabbage
- Lemon wedges
- Steamed rice
The Science Behind the Perfect Tempura Batter
The secret to ethereally light tempura lies in understanding the science behind the batter. My biggest tempura breakthrough came when I learned why temperature matters so much:
Cold batter = less gluten development = lighter, crispier coating
When flour mixes with water, it forms gluten—the protein structure that gives bread its chewy texture. For tempura, we want minimal gluten development, which is why we use:
- Ice-cold ingredients to slow gluten formation
- Minimal mixing to prevent gluten development
- Carbonation (from the egg and quick mixing) to create tiny air bubbles
This creates a batter that’s barely held together—it should look lumpy and inconsistent, which is exactly what we want for that characteristic lacy texture.
Preparation: Setting Up Your Tempura Station
Successful tempura requires some advance preparation. I’ve learned the hard way that trying to wing it leads to subpar results. Here’s how I prepare my tempura station:
- Cut chicken into 1-inch strips or 2-inch chunks (uniform size ensures even cooking)
- Season chicken with salt, white pepper, and sake if using
- Prepare a wire rack set over a baking sheet for draining
- Have paper towels ready
- Prepare dipping sauce in advance
- Set up a thermometer for monitoring oil temperature
- Prepare a “spider” strainer or slotted spoon for removing tempura
- Keep ice nearby to maintain cold batter
This might seem like a lot of preparation, but it makes the actual cooking process smooth and stress-free.
The Perfect Tentsuyu Dipping Sauce
A great tempura experience isn’t complete without the traditional dipping sauce called tentsuyu. Here’s my tried and true recipe:
Ingredients:
- ¾ cup (180ml) dashi stock (instant is fine)
- 3 tablespoons soy sauce
- 3 tablespoons mirin (sweet rice wine)
- 1 tablespoon sugar (optional)
Instructions:
- Combine all ingredients in a small saucepan
- Bring to a simmer over medium heat
- Once sugar dissolves completely, remove from heat
- Allow to cool to room temperature before serving
The sauce can be made up to a week in advance and stored in the refrigerator. Always serve at room temperature with freshly grated daikon radish, which adds a refreshing counterpoint to the fried tempura.
Step-by-Step Chicken Tempura Technique
Now for the main event—creating that perfect light and crispy tempura coating! Follow these steps carefully:
Step 1: Prepare the Chicken
- Pat chicken pieces dry with paper towels (moisture is the enemy of crispness)
- Let chicken sit at room temperature for 15 minutes before cooking
- Re-dry with paper towels just before battering
Step 2: Heat the Oil
- Fill a heavy-bottomed pot with oil to a depth of 2-3 inches
- Heat oil to 340-350°F (170-180°C)
- Maintain this temperature range throughout cooking
Step 3: Prepare the Batter (Do this only when oil is almost at temperature)
- Sift flour and cornstarch into a medium bowl
- In a separate bowl or measuring cup, beat the egg lightly
- Add ice water to the egg and mix
- Pour the wet ingredients into the dry ingredients
- Mix very briefly with chopsticks or a fork—about 10-15 strokes
- Leave lumps in the batter—it should look craggy and uneven
Step 4: Batter and Fry the Chicken
- Dip chicken pieces into the batter one at a time
- Let excess batter drip off for a second
- Gently place in hot oil, away from you to prevent splashing
- Cook only 3-4 pieces at a time to maintain oil temperature
- Fry for 2-3 minutes, turning occasionally, until golden and crisp
- Check internal temperature—chicken should reach 165°F (74°C)
Step 5: Drain and Serve
- Remove with a slotted spoon or spider strainer
- Place on wire rack (not paper towels) for optimal crispness
- Serve immediately for best texture
Detailed Tempura Cooking Temperature Guide
Temperature control is absolutely crucial for perfect tempura. After many batches of trial and error, I’ve found these specific temperatures work best:
| Oil Temperature | Type of Item | Expected Cook Time | Results |
|---|---|---|---|
| 320°F (160°C) | Large chicken pieces | 4-5 minutes | Thoroughly cooked interior, lighter color |
| 340°F (170°C) | Medium chicken strips | 3-4 minutes | Golden exterior, juicy interior |
| 350°F (180°C) | Small chicken pieces | 2-3 minutes | Extra crispy exterior |
| 375°F (190°C) | Avoid this temperature | N/A | Too hot – batter browns before chicken cooks |
| Below 320°F (160°C) | Not recommended | N/A | Absorbs too much oil, becomes soggy |
I always start with the oil slightly hotter than my target temperature (about 10°F higher) since adding food to the oil will lower the temperature. Using a reliable thermometer has made the biggest difference in my tempura consistency!
Common Tempura Problems and Solutions
Over the years, I’ve encountered every possible tempura problem. Here are the solutions I’ve discovered:
Greasy, Oil-Soaked Tempura
- Cause: Oil temperature too low
- Solution: Maintain 340-350°F (170-180°C) oil temperature
Batter Falls Off During Frying
- Cause: Chicken too wet or cold
- Solution: Pat dry thoroughly and bring to room temperature
Dark, Overcooked Exterior with Raw Interior
- Cause: Oil too hot, pieces too large
- Solution: Lower temperature, cut chicken smaller
Heavy, Doughy Batter
- Cause: Overmixing batter, warm ingredients
- Solution: Mix minimally, use ice-cold ingredients
Pale, Undercooked Looking Tempura
- Cause: Oil not hot enough, or batter too thick
- Solution: Increase oil temperature slightly, thin batter with cold water
Creative Serving Suggestions
While traditional tempura is perfect on its own, I love getting creative with presentations:
- Tempura Rice Bowls (Tendon): Drizzle chicken tempura with a sweet-savory sauce over hot rice
- Tempura Udon: Serve alongside or on top of hot udon noodle soup
- Tempura Sushi Rolls: Use crispy tempura pieces in sushi rolls
- Tempura Tacos: Create fusion cuisine with tempura in soft tortillas with Asian slaw
- Bento Box: Include tempura as part of a Japanese-style lunch box
For a complete meal, I typically serve my chicken tempura with:
- Shredded cabbage with sesame dressing
- Steamed rice
- Miso soup
- Japanese pickles (tsukemono)
- Green tea
Healthier Adaptation Options
While traditional tempura is fried, I’ve experimented with some healthier alternatives that still capture the essence of tempura:
Air Fryer Tempura
- Spray battered chicken with oil spray
- Air fry at 375°F (190°C) for 7-8 minutes
- Results: Lighter and less oil, though not identical to traditional tempura
Oven-Baked “Tempura”
- Preheat oven to 450°F (230°C)
- Place battered chicken on a well-oiled baking sheet
- Bake for 10-12 minutes, flipping halfway
- Results: Different texture but still delicious with tempura flavors
These alternatives might not give you the authentic tempura experience, but they’re great options for everyday cooking when you want something lighter.
Equipment Recommendations for Tempura Success
After trying numerous setups, here’s what I consider essential for tempura success:
Essential Equipment:
- Heavy-bottomed pot or wok (holds heat well)
- Reliable instant-read thermometer
- Spider strainer or slotted spoon
- Wire cooling rack (prevents sogginess during cooling)
- Chopsticks or cooking chopsticks for handling tempura
Nice-to-Have Equipment:
- Deep fryer with temperature control
- Tempura paper (traditional oil-absorbing paper)
- Tempura dipping sauce bowls
- Specialized tempura flour (available at Asian markets)
The most important investment is definitely a good thermometer—it transformed my tempura results from inconsistent to restaurant-quality.
Cultural Tips and Etiquette
When I visited Japan and took a tempura cooking class, I learned some fascinating cultural aspects of tempura:
- Tempura is traditionally eaten by dipping only part of the piece into the sauce to maintain crispness
- The traditional accompaniment of grated daikon radish helps digestion
- High-end tempura restaurants in Japan are called “tempura-ya” and often serve pieces one at a time
- Tempura chefs train for years before being allowed to cook for customers
- The order of eating matters: lighter items first, heavier items later
Understanding these cultural elements has deepened my appreciation for tempura beyond just a delicious dish.
Storage and Reheating (If You Must)
Tempura is at its absolute peak when freshly made—this is why tempura chefs serve pieces immediately after cooking. However, life happens, and sometimes you need to save leftovers:
Storage:
- Allow tempura to cool completely
- Store in an airtight container with paper towels to absorb moisture
- Refrigerate for up to 2 days
- Never freeze tempura (the texture deteriorates significantly)
Reheating Methods (Ranked by Effectiveness):
- Toaster oven: 350°F (180°C) for 3-4 minutes
- Regular oven: 325°F (165°C) for 5-6 minutes
- Air fryer: 350°F (180°C) for 2-3 minutes
- Microwave: Absolute last resort—30 seconds wrapped in a paper towel (will be soggy)
I’ve found that adding a small sprinkle of salt after reheating helps revive some of the flavor that diminishes during storage.
Questions & Answers
Q: Can I prepare the chicken or batter in advance?
The chicken can be seasoned and refrigerated up to 24 hours in advance, but the batter should always be made at the last minute. Preparing batter ahead of time allows gluten to develop and results in a heavy, tough coating instead of the light, crispy texture we’re aiming for.
Q: What’s the best oil for tempura?
I recommend neutral oils with high smoke points like canola, vegetable, or rice bran oil. Traditional tempura in Japan often uses sesame oil or a blend of oils, but these can be expensive. Avoid olive oil as its flavor is too strong and smoke point too low.
Q: Why did my tempura turn out soggy?
Soggy tempura usually results from oil that’s not hot enough (below 340°F/170°C), overcrowding the pot, or letting the cooked tempura sit on paper towels (use a wire rack instead). Also, if your batter contains too much water or was overmixed, this can lead to sogginess.
Q: Is tempura batter the same as other fried chicken batters?
No, tempura batter is distinctly different. It uses cold water and minimal mixing to create a thin, inconsistent batter that creates that characteristic lacy texture. Southern fried chicken batters, by contrast, often use buttermilk and aim for a thicker, more substantial coating.
Q: Can I use chicken with skin on?
Yes, skin-on chicken pieces make excellent tempura! The skin adds flavor and creates an extra crispy texture. Just ensure it’s completely dry before battering, and adjust cooking time slightly as skin-on pieces may take a bit longer to cook through.
Q: What are good vegetable options to fry alongside chicken tempura?
Sweet potatoes, bell peppers, shiitake mushrooms, eggplant, shiso leaves, and kabocha squash all make wonderful tempura. I often prepare a mixed tempura platter with chicken and several vegetables for variety. Just remember that vegetables generally cook faster than chicken, so fry them separately.
Q: How can I keep tempura warm while cooking multiple batches?
Keep your oven at the lowest setting (around 200°F/95°C) and place finished tempura on a wire rack over a baking sheet. Don’t cover it or the steam will make it soggy. Try to serve within 15-20 minutes for the best texture.
Q: What’s the difference between Japanese tempura and other fried chicken?
The main differences are in the batter and technique. Tempura uses a very light, barely mixed batter with cold ingredients to prevent gluten development. The oil temperature is carefully controlled to create that distinctive light, crispy coating. The result is much lighter and less greasy than most western-style fried chicken.
Final Thoughts
Mastering chicken tempura has been one of my most rewarding culinary journeys. There’s something truly magical about transforming simple ingredients into something so delicate and satisfying through technique and attention to detail.
Remember that perfect tempura is as much about the process as the recipe. Temperature control, minimal mixing, and proper preparation make all the difference. Don’t be discouraged if your first attempt isn’t perfect—each batch will teach you something and bring you closer to tempura mastery.
I hope this guide helps you create tempura that brings a taste of Japan into your kitchen. There’s nothing quite like the pride of serving homemade tempura that’s every bit as light and crispy as what you’d find in a specialized tempura restaurant.
Happy cooking!