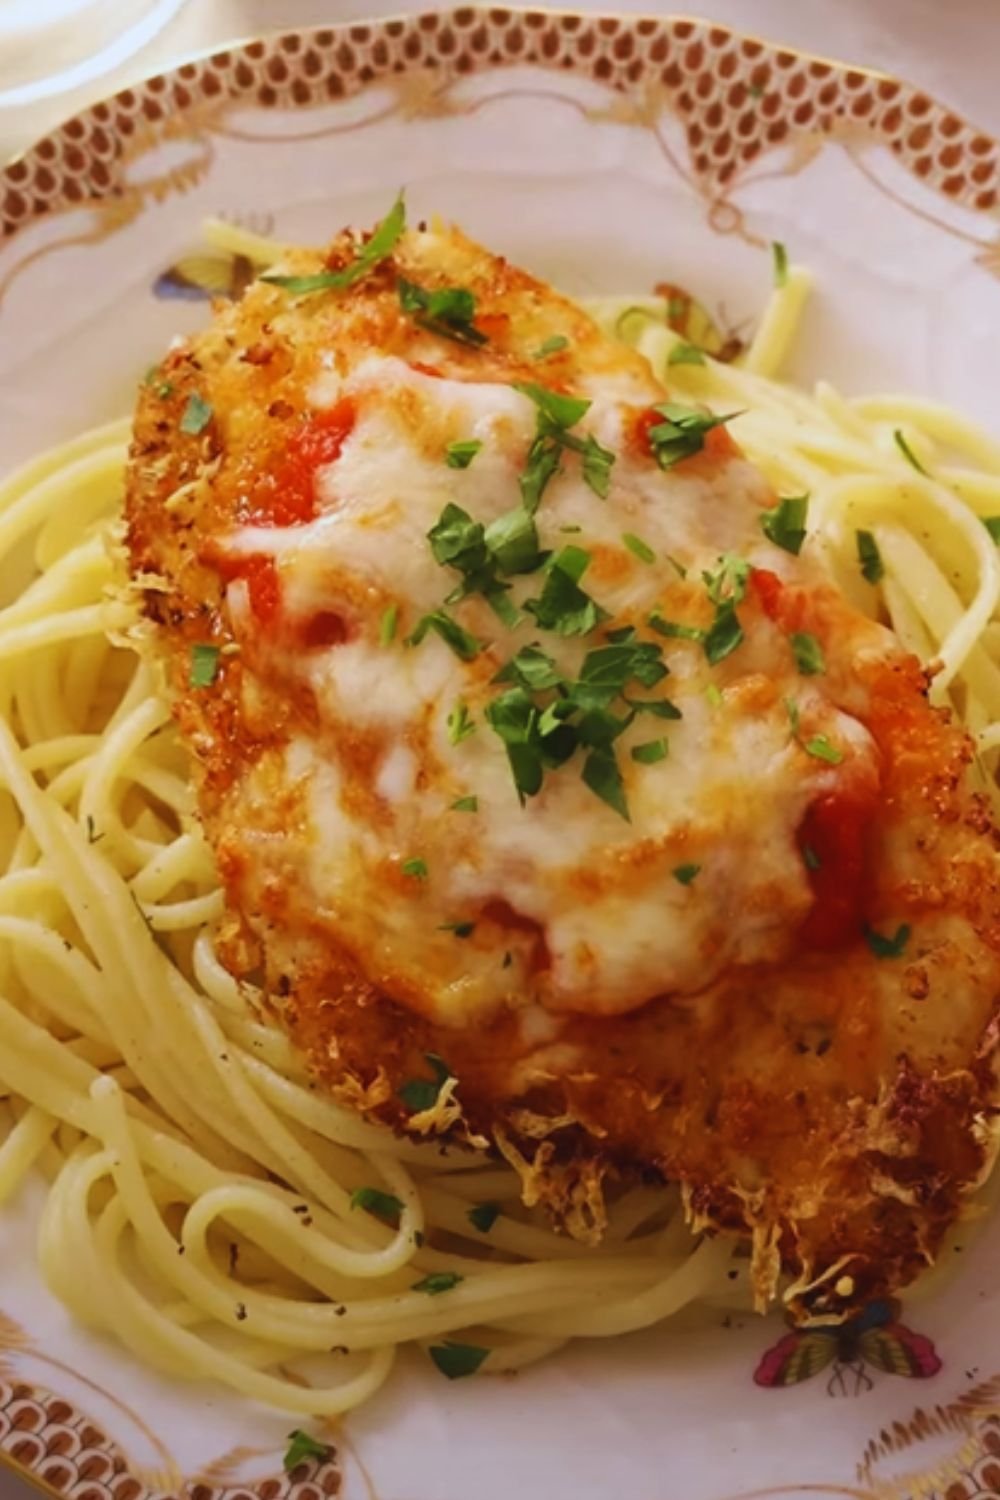
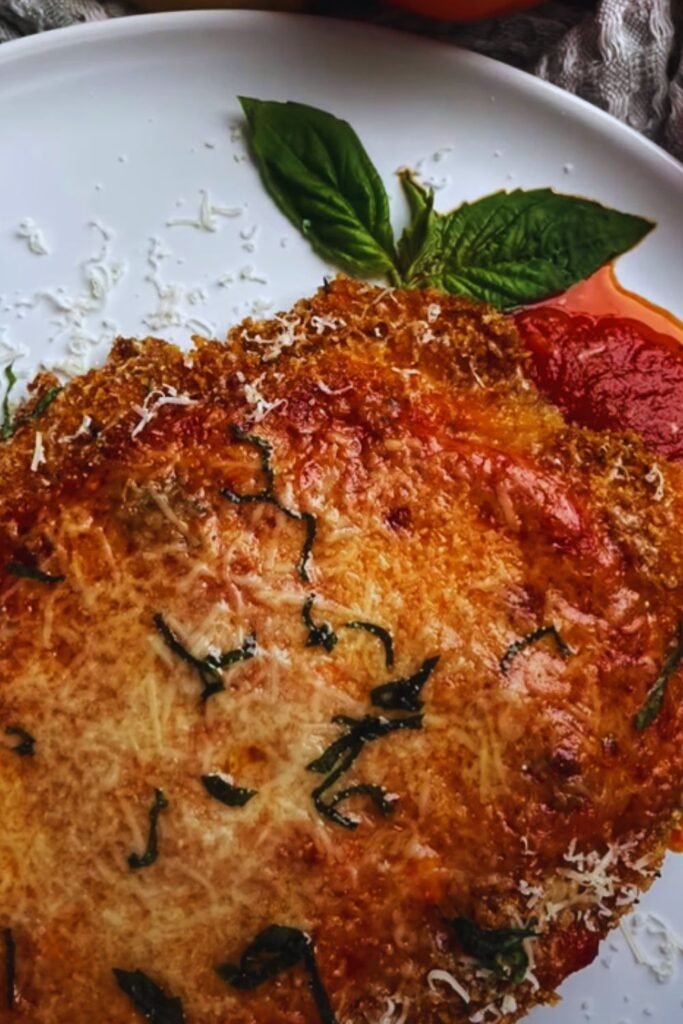
There’s something magical about cutting into a perfectly crispy chicken cutlet, watching the melted cheese stretch between your plate and fork, and savoring that first bite of tangy tomato sauce. Chicken Parmigiana (or as the Italians call it, “Chicken Parmigiana”) has been my go-to comfort food for years, and today I’m sharing my foolproof recipe that brings the authentic flavors of Italy right to your dinner table.
As someone who has spent countless hours perfecting this classic dish, I can tell you that making restaurant-quality Chicken Parmigiana at home isn’t just possible—it’s surprisingly straightforward when you understand the key techniques. Whether you’re cooking for a special date night or simply craving something hearty and satisfying for a family dinner, this recipe delivers impressive results every time.
The Origins of Chicken Parmigiana
Before we dive into the cooking process, let’s take a moment to appreciate where this beloved dish comes from. Despite its Italian-sounding name, Chicken Parmigiana as we know it today is actually an Italian-American creation that evolved from the traditional Italian eggplant parmigiana (melanzane alla parmigiana).
Italian immigrants who settled in America in the early 20th century adapted their homeland recipes using ingredients that were more readily available in their new country. Chicken was more affordable and accessible than it had been in Italy, leading to the creation of this now-iconic dish.
The name “parmigiana” doesn’t actually refer to parmesan cheese as many assume, but rather to the style of cooking from Parma, Italy. That said, both parmesan and mozzarella cheeses have become essential components of the modern version.
Essential Ingredients for Authentic Flavor
The beauty of Chicken Parmigiana lies in its relatively simple ingredient list, but don’t be fooled—each component plays a crucial role in developing that classic flavor profile:
The Chicken
- Boneless, skinless chicken breasts (about 2 pounds for 4 servings)
- The key is in the pounding! Uniform thickness ensures even cooking
The Breading Station
- All-purpose flour (1 cup)
- Eggs (3 large)
- Breadcrumbs (2 cups) – I strongly recommend a mix of Italian-seasoned and panko for the perfect texture
- Grated Parmesan cheese (½ cup)
- Dried herbs: oregano, basil, garlic powder
- Salt and freshly ground black pepper
The Sauce
- San Marzano tomatoes (28-ounce can) – these Italian plum tomatoes make all the difference
- Fresh garlic (4-5 cloves)
- Fresh basil leaves (about 10-12 leaves)
- Extra virgin olive oil (3 tablespoons)
- Salt and red pepper flakes to taste
The Cheese Topping
- Fresh mozzarella (8 ounces), sliced or shredded
- Additional Parmesan cheese (¼ cup)
For Cooking
- Vegetable oil or canola oil for frying (about 2 cups)
Kitchen Equipment You’ll Need
Before you start cooking, make sure you have these essential tools ready:
- Meat mallet or heavy rolling pin
- Shallow dishes for breading station
- Large, heavy-bottomed skillet for frying
- Baking sheet or oven-safe dish
- Parchment paper
- Kitchen thermometer (helpful but optional)
- Paper towels
- Aluminum foil
Step-by-Step Instructions
Now that we’ve covered the essentials, let’s break down the process into manageable steps. The key to success with this recipe is organization and timing.
Step 1: Prepare the Chicken
- Place chicken breasts between two sheets of plastic wrap or parchment paper.
- Using a meat mallet or heavy rolling pin, pound the chicken breasts to an even thickness of about ¼-inch. Work from the center outward for best results.
- Season both sides generously with salt and pepper.
- For larger chicken breasts, consider cutting them in half after pounding to create more manageable portions.
Step 2: Make the Tomato Sauce
I always start with the sauce because it can simmer and develop flavor while you prepare the chicken.
- Heat olive oil in a saucepan over medium heat.
- Add minced garlic and cook until fragrant but not browned, about 30 seconds.
- Crush the San Marzano tomatoes by hand as you add them to the pot, along with their juice.
- Add a pinch of salt and red pepper flakes.
- Tear half of the basil leaves and add to the sauce.
- Reduce heat to low and simmer for 20-30 minutes, stirring occasionally.
- Taste and adjust seasoning as needed. The sauce should be slightly chunky but smooth enough to coat the back of a spoon.
Step 3: Set Up Your Breading Station
Having an efficient breading station makes the process much cleaner and more organized:
- Arrange three shallow dishes in a row:
- First dish: 1 cup all-purpose flour seasoned with ½ teaspoon salt
- Second dish: 3 eggs beaten with 2 tablespoons water
- Third dish: 2 cups breadcrumbs mixed with ½ cup grated Parmesan, 1 teaspoon dried oregano, 1 teaspoon dried basil, and ½ teaspoon garlic powder
- Place a clean plate at the end for your breaded chicken pieces.
- Have paper towels ready for draining the fried chicken.
Step 4: Bread the Chicken
Now comes the fun part that creates that irresistible crispy exterior:
- Working with one piece at a time, dredge the chicken in flour, shaking off excess.
- Dip into the beaten eggs, allowing excess to drip off.
- Press firmly into the breadcrumb mixture, ensuring an even coating on both sides.
- Place the breaded chicken on the clean plate and repeat with remaining pieces.
- For extra crispiness, let the breaded chicken rest in the refrigerator for 15-30 minutes before frying.
Step 5: Fry the Chicken
The frying step requires attention to detail for that perfect golden crust:
- Preheat your oven to 375°F (190°C).
- Heat oil in a large, heavy-bottomed skillet over medium-high heat until it reaches approximately 350°F (175°C). The oil should be about ¼-inch deep.
- Working in batches to avoid overcrowding, carefully place chicken in the hot oil.
- Fry until golden brown, about 3-4 minutes per side.
- Transfer to paper towels to drain excess oil.
Step 6: Assemble and Bake
This is where the magic happens as all components come together:
- Spread a thin layer of tomato sauce in a baking dish large enough to fit all chicken pieces.
- Arrange the fried chicken cutlets in the dish, slightly overlapping if necessary.
- Spoon more sauce over each piece of chicken, being careful not to cover completely (leave some crispy edges exposed).
- Layer slices of fresh mozzarella on top of each piece.
- Sprinkle with additional grated Parmesan cheese.
- Bake in the preheated oven for 15-20 minutes, until cheese is melted and bubbly.
- For a beautiful finish, broil for the last 2-3 minutes until cheese develops golden spots.
- Remove from oven and let rest for 5 minutes.
- Garnish with remaining fresh basil leaves.
Common Mistakes to Avoid
Even experienced cooks can run into issues with Chicken Parmigiana. Here are some pitfalls to watch out for:
- Uneven chicken thickness: Take your time when pounding the chicken. Uneven thickness leads to inconsistent cooking.
- Overcrowding the frying pan: This lowers the oil temperature and results in soggy rather than crispy chicken. Fry in batches even if it takes longer.
- Oil temperature too high or too low: Too high and the breading burns before the chicken cooks; too low and the breading absorbs too much oil. Aim for 350°F (175°C).
- Too much sauce: Drowning the chicken in sauce makes the breading soggy. Use a moderate amount.
- Skipping the resting period: Letting the breaded chicken rest before frying helps the coating adhere better.
- Using pre-shredded cheese: These contain anti-caking agents that prevent proper melting. Grate your own cheese for best results.
Make-Ahead and Storage Tips
Chicken Parmigiana is perfect for meal prep. Here’s how to make components ahead:
- Sauce: Can be made up to 3 days in advance and stored in the refrigerator, or frozen for up to 3 months.
- Breaded chicken: Can be prepared and refrigerated for up to 8 hours before frying.
- Fried chicken (not sauced): Can be refrigerated for up to 1 day. Reheat in a 350°F oven for 10 minutes before topping with sauce and cheese.
- Fully assembled: Leftovers can be refrigerated for up to 3 days. Reheat in a 350°F oven until warmed through (about 20 minutes).
Serving Suggestions
A dish this special deserves thoughtful accompaniments. Here are my favorite ways to serve Chicken Parmigiana:
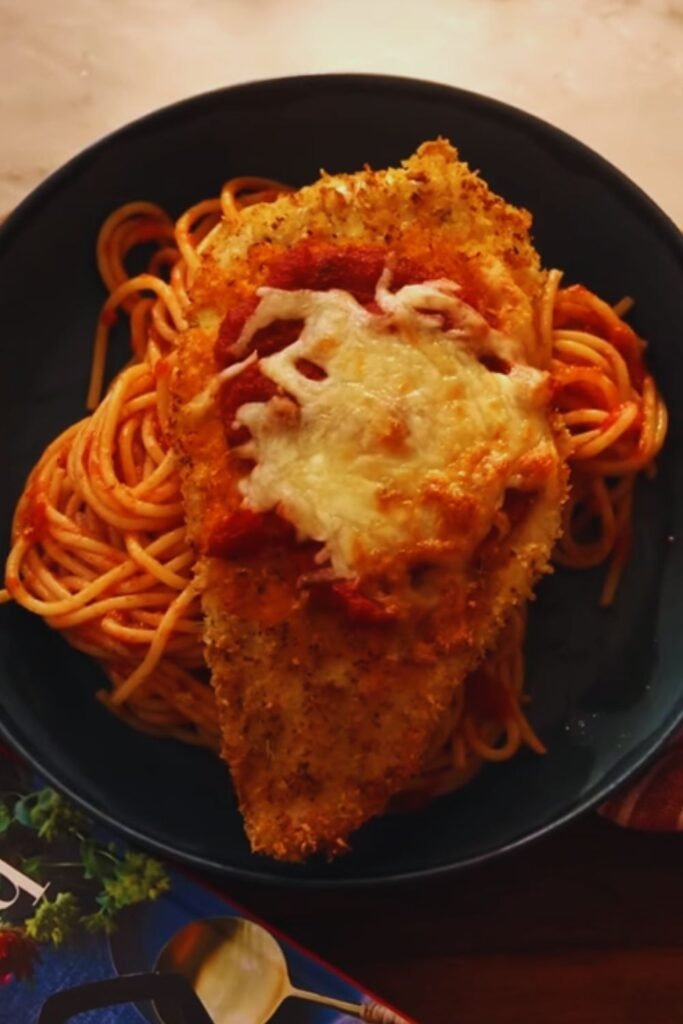
Classic Pairings
- Al dente spaghetti or linguine tossed lightly with olive oil and herbs
- Crusty Italian bread for soaking up extra sauce
- Simple green salad with lemon vinaigrette
- Sautéed Italian vegetables like zucchini, bell peppers, and onions
- Garlic bread or garlic knots
Beverage Pairings
- Sparkling water with lemon
- Italian soda
- Iced tea with fresh mint
Nutrition Information
For those keeping track of nutritional values, here’s an approximate breakdown per serving (based on 4 servings):
| Nutrient | Amount per Serving |
|---|---|
| Calories | 560 |
| Protein | 42g |
| Carbohydrates | 38g |
| Fat | 28g (8g saturated) |
| Fiber | 3g |
| Sodium | 820mg |
| Calcium | 320mg |
| Iron | 3.5mg |
*Note: Values are approximate and will vary based on specific ingredients and portions.
Variations to Try
Once you’ve mastered the classic version, consider these delicious variations:
Eggplant Parmigiana
Substitute sliced eggplant for chicken for a traditional vegetarian option. Salt and drain the eggplant slices for 30 minutes before breading to remove bitterness.
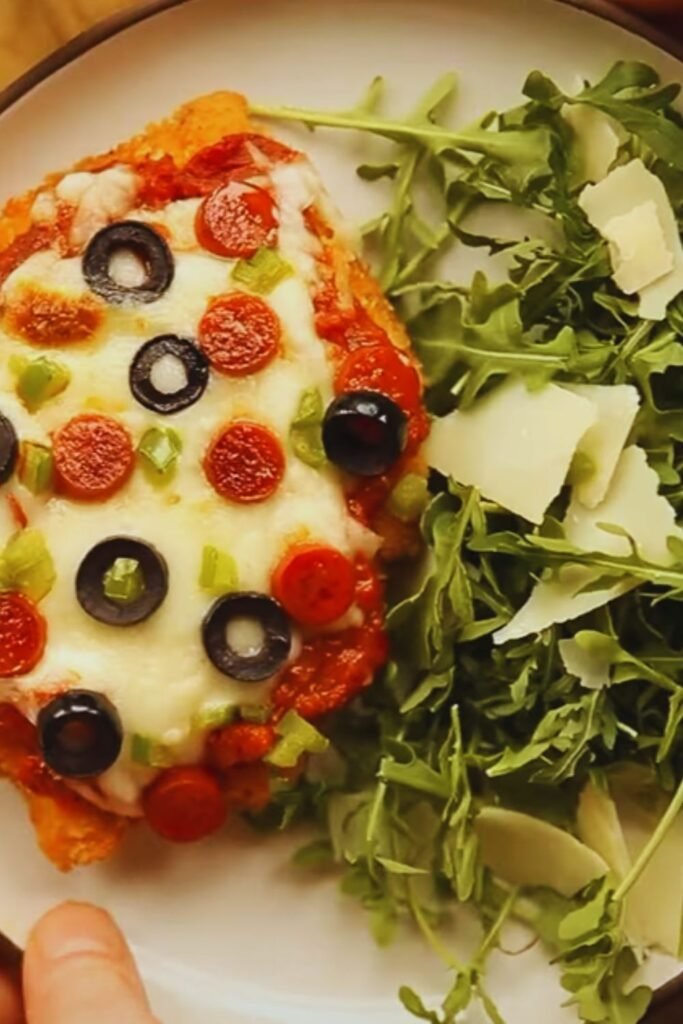
Chicken Parmigiana Sandwiches
Place a chicken cutlet on a crusty Italian roll with sauce and melted cheese for an incredible sandwich experience.
Healthier Baked Version
Skip the frying and bake the breaded chicken at 425°F for about 20 minutes before topping with sauce and cheese.
Spicy Arrabbiata Parmigiana
Add crushed red pepper flakes to your sauce for a spicier kick.
Prosciutto Parmigiana
Layer thin slices of prosciutto between the chicken and cheese for an extra flavor dimension.
Troubleshooting Guide
| Problem | Possible Cause | Solution |
|---|---|---|
| Soggy breading | Too much sauce or sauce added too early | Use less sauce and don’t add until just before baking |
| Chicken not cooked through | Cutlets too thick or oil temperature too high | Ensure even thickness and monitor oil temperature |
| Cheese not melting properly | Oven temperature too low or using processed cheese | Use fresh mozzarella and ensure oven is properly preheated |
| Sauce too acidic | Tomatoes too tart or not cooked long enough | Add a pinch of sugar and simmer sauce longer |
| Breading falling off | Chicken surface too wet or breading not pressed firmly | Pat chicken dry before breading and press coating firmly |
| Burnt exterior, raw interior | Oil temperature too high | Lower heat and ensure oil stays around 350°F |
Frequently Asked Questions
Q: Can I use chicken thighs instead of breasts? Yes! Boneless, skinless chicken thighs work beautifully in this recipe. They’re more forgiving and less likely to dry out, though you’ll need to adjust cooking time slightly as they may take a bit longer.
Q: Is it necessary to fry the chicken? Can I bake it instead? While frying gives the authentic crispy texture, you can absolutely bake the breaded chicken. Spray or brush with oil and bake at 425°F for 20 minutes, flip halfway through, then top with sauce and cheese and continue baking until done.
Q: My breading always falls off during frying. What am I doing wrong? Make sure to pat the chicken completely dry before starting the breading process, and refrigerate the breaded chicken for 15-30 minutes before frying to help the coating adhere better.
Q: Can I use store-bought sauce to save time? Absolutely! While homemade sauce offers superior flavor, a good quality jarred marinara can be a time-saver. Look for one with minimal ingredients and no added sugars.
Q: How do I know when the oil is the right temperature without a thermometer? Drop a small piece of breadcrumb into the oil. If it sizzles immediately and rises to the surface, the oil is ready. If it sinks or burns quickly, adjust your heat accordingly.
Q: Can I make this gluten-free? Yes! Substitute the all-purpose flour with rice flour and use gluten-free breadcrumbs. The result is nearly indistinguishable from the traditional version.
Q: What’s the best way to reheat leftovers without making them soggy? Reheat in a 350°F oven uncovered for about 15-20 minutes. Avoid the microwave, which will make the breading soggy.
A Personal Note
I still remember the first time I made Chicken Parmigiana from scratch. It was for a dinner date that I was particularly nervous about, and I wanted to impress with something that seemed fancy but was actually within my comfort zone. The combination of the sizzling chicken hitting the hot oil, the aroma of the simmering tomato sauce, and that moment when the cheese turned perfectly golden in the oven—it created a sensory experience that made the evening memorable.
What I love most about this dish is how it brings people together. There’s something about serving a bubbling tray of Chicken Parmigiana that makes a meal feel special, regardless of the occasion. It’s equally at home on a weeknight family dinner table as it is at a dinner party with friends.
The true beauty of Chicken Parmigiana is that despite its impressive presentation, it’s fundamentally comfort food—familiar, satisfying, and guaranteed to please even the pickiest eaters. I hope this recipe becomes a favorite in your household as it has in mine.
So go ahead, gather your ingredients, roll up your sleeves, and prepare to create a meal that honors tradition while making new memories around your table. Buon appetito!