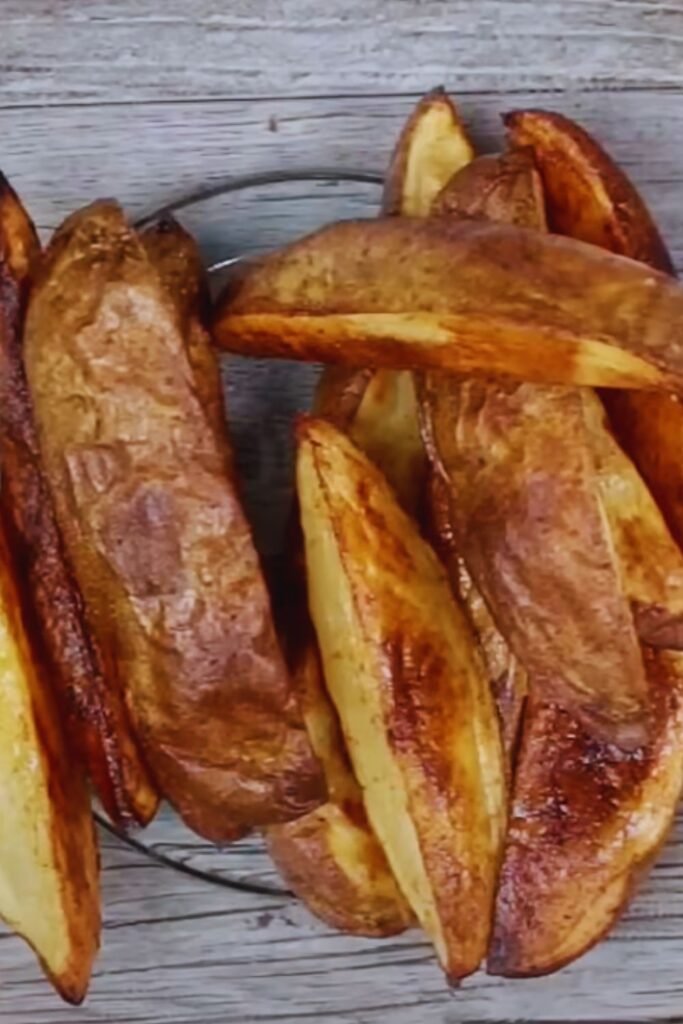
There’s something magical about perfectly crispy potato wedges fresh from the oven. That golden exterior giving way to a fluffy interior creates a side dish that’s both comforting and impressive. I’ve spent years perfecting my technique for making restaurant-quality potato wedges at home, and today I’m sharing all my secrets with you. Whether you’re serving these alongside burgers, using them to scoop up your favorite dip, or simply enjoying them on their own, these roasted potato wedges are guaranteed to be a crowd-pleaser.
Why You’ll Love This Recipe
I remember the first time I made truly exceptional potato wedges. After numerous disappointing attempts that resulted in either soggy or burnt offerings, I finally cracked the code. The secret? It’s all about technique. When you understand the science behind what makes potatoes crisp up perfectly, you’ll never suffer through mediocre wedges again.
These oven-roasted potato wedges are:
- Perfectly crispy on the outside, fluffy on the inside
- Seasoned to perfection with a customizable spice blend
- Healthier than deep-fried alternatives
- Simple to prepare with everyday ingredients
- Versatile enough to complement virtually any meal
- A guaranteed crowd-pleaser for all ages
Choosing the Perfect Potatoes
Not all potatoes are created equal when it comes to making outstanding wedges. I’ve experimented with every variety I could get my hands on, and here’s what I’ve learned:
Russet potatoes : These large, starchy potatoes create wedges with incredibly fluffy interiors and crispy exteriors. They’re my top choice for classic wedges.
Yukon Gold potatoes : These medium-starch potatoes offer a beautiful balance between creaminess and crispness. They have a naturally buttery flavor that elevates the final dish.
Red potatoes : These waxy potatoes hold their shape exceptionally well but won’t get quite as crispy. They’re perfect when you want a more substantial bite.
For the absolute best results, I recommend using medium to large Russet potatoes. Their high starch content is the secret to achieving that perfect contrast between crispy exterior and fluffy interior.
Essential Ingredients for Perfect Potato Wedges
The beauty of this recipe lies in its simplicity. With just a few basic ingredients, you can create magnificent potato wedges that rival those from your favorite restaurant.
For basic roasted potato wedges, you’ll need:
- 4 large Russet potatoes (about 2-2.5 pounds)
- 3 tablespoons olive oil
- 2 teaspoons garlic powder
- 2 teaspoons paprika (sweet or smoked)
- 1 teaspoon onion powder
- 1 teaspoon dried oregano or rosemary
- ½ teaspoon black pepper
- 1 teaspoon kosher salt, plus more to taste
- ¼ teaspoon cayenne pepper (optional, for heat)
The Science Behind Crispy Potato Wedges
Over the years, I’ve become somewhat obsessed with understanding exactly what makes a perfect potato wedge. It turns out there’s quite a bit of science involved.
The key to achieving that coveted crispy exterior lies in removing excess moisture from the surface of the potato. When potatoes are cut, starch is released. If you soak the potatoes in cold water, much of this starch is washed away. This might seem counterintuitive—wouldn’t starch help with crispiness? But too much surface starch can actually prevent proper crisping.
After soaking, thoroughly drying the potatoes is crucial. Any remaining surface moisture will create steam in the oven, which is the enemy of crispiness. That’s why I always take the extra time to thoroughly pat my potatoes dry before seasoning and roasting them.
The initial high temperature of the oven (425°F/220°C) helps to quickly evaporate surface moisture and begins forming that crispy exterior. Using a preheated baking sheet also gives the potatoes a head start on crisping from the moment they hit the pan.
Step-by-Step Method for Perfect Wedges
Here’s my foolproof method for making the absolute best oven-roasted potato wedges:
- Preheat your oven to 425°F (220°C). Place a large baking sheet in the oven to preheat as well.
- Wash and scrub the potatoes thoroughly under cold running water.
- Cut each potato in half lengthwise, then cut each half into 3-4 wedges, depending on the size of your potatoes. Try to keep the wedges as uniform in size as possible.
- Place the potato wedges in a large bowl filled with cold water. Let them soak for 30 minutes. This removes excess starch and helps achieve maximum crispiness.
- After soaking, drain the potatoes and pat them very dry with paper towels or a clean kitchen towel. This is crucial—excess moisture is the enemy of crispiness.
- In a large bowl, combine the olive oil, garlic powder, paprika, onion powder, dried herbs, black pepper, salt, and cayenne (if using).
- Add the dried potato wedges to the bowl and toss until they’re evenly coated with the oil and spice mixture.
- Carefully remove the preheated baking sheet from the oven (use oven mitts!). Arrange the potato wedges on the hot sheet, skin side down, ensuring they’re not touching each other.
- Bake for 30-35 minutes, flipping the wedges halfway through cooking time, until they’re golden brown and crispy.
- Once done, let them rest for 5 minutes before serving. This allows the exterior to set up for maximum crispness.
Temperature and Timing Secrets
The perfect temperature for roasting potato wedges is 425°F (220°C). This high heat helps to quickly create a crispy exterior while allowing the interior to become perfectly tender.
I’ve found that the exact cooking time can vary based on several factors:
- The size of your wedges
- The water content of your potatoes
- Your particular oven’s quirks
As a general rule, 30-35 minutes total cooking time works well for medium-sized wedges. However, I always recommend using visual cues as your primary guide. Look for deeply golden edges and a fork-tender interior.
For extra-large wedges, you might need to extend the cooking time to 40-45 minutes. If this is the case, consider dropping the temperature to 400°F (200°C) after the first 30 minutes to prevent burning while ensuring the centers cook through.
Flavor Variations to Try
While the basic seasoning combination I’ve shared above is delicious, one of the joys of making potato wedges is experimenting with different flavor profiles. Here are some of my favorite variations:
Herb and Parmesan Wedges
Add 1/3 cup freshly grated Parmesan cheese and 2 tablespoons finely chopped fresh herbs (rosemary, thyme, and parsley work beautifully) to the basic recipe. Toss the cheese and herbs with the hot wedges immediately after they come out of the oven.
Spicy Cajun Wedges
Replace the basic seasoning mix with 2-3 tablespoons of your favorite Cajun seasoning blend. If your blend doesn’t contain salt, add 1 teaspoon of kosher salt as well.
Garlic and Herb Wedges
Increase the garlic powder to 1 tablespoon and add 2 tablespoons of dried Italian herb blend. After baking, toss with 2 tablespoons of freshly minced parsley for a burst of fresh flavor.
Salt and Vinegar Wedges
After soaking the potatoes, drain them and then soak again in 2 cups water mixed with 1/2 cup white vinegar for 30 minutes. Drain, dry thoroughly, and proceed with the basic recipe, omitting the herbs and using only salt and pepper for seasoning.
Common Problems and How to Solve Them
Even with the best techniques, things can sometimes go wrong. Here are solutions to the most common potato wedge problems I’ve encountered:

Problem: Wedges are soggy, not crispy
Solution: Make sure you’re thoroughly drying the potatoes after soaking. Also, check that you’re not overcrowding the baking sheet—potatoes need space around them for proper crisping. Finally, ensure your oven is truly at the right temperature by using an oven thermometer.
Problem: Wedges are burning on the outside but raw inside
Solution: Your wedges might be cut too thick, or your oven temperature might be too high. Try cutting them smaller or reducing the oven temperature to 400°F (200°C) and extending the cooking time.
Problem: Seasonings are burning
Solution: Some spices, especially those containing sugar, can burn at high temperatures. If this happens, try tossing the potatoes with just oil and salt before roasting, then adding the more delicate seasonings during the last 10-15 minutes of cooking.
Problem: Wedges are sticking to the pan
Solution: Make sure your baking sheet is well-oiled. For extra insurance against sticking, you can line the sheet with parchment paper, though you might sacrifice a bit of crispiness on the bottom.
Make-Ahead and Storage Tips
While potato wedges are at their absolute best when fresh from the oven, life doesn’t always allow for last-minute preparation. Here’s how to work around timing constraints:
Make-Ahead Options:
- You can cut and soak the potatoes up to 24 hours in advance. Keep them refrigerated in the water.
- You can par-bake the wedges for 20 minutes, let them cool completely, then refrigerate. Finish baking for 10-15 minutes at 425°F (220°C) just before serving.
Storage and Reheating:
- Store leftover wedges in an airtight container in the refrigerator for up to 3 days.
- To reheat, arrange in a single layer on a baking sheet and bake at 400°F (200°C) for 10-15 minutes until heated through and crispy again.
- Avoid microwaving if possible—it will make your once-crispy wedges soft and soggy.
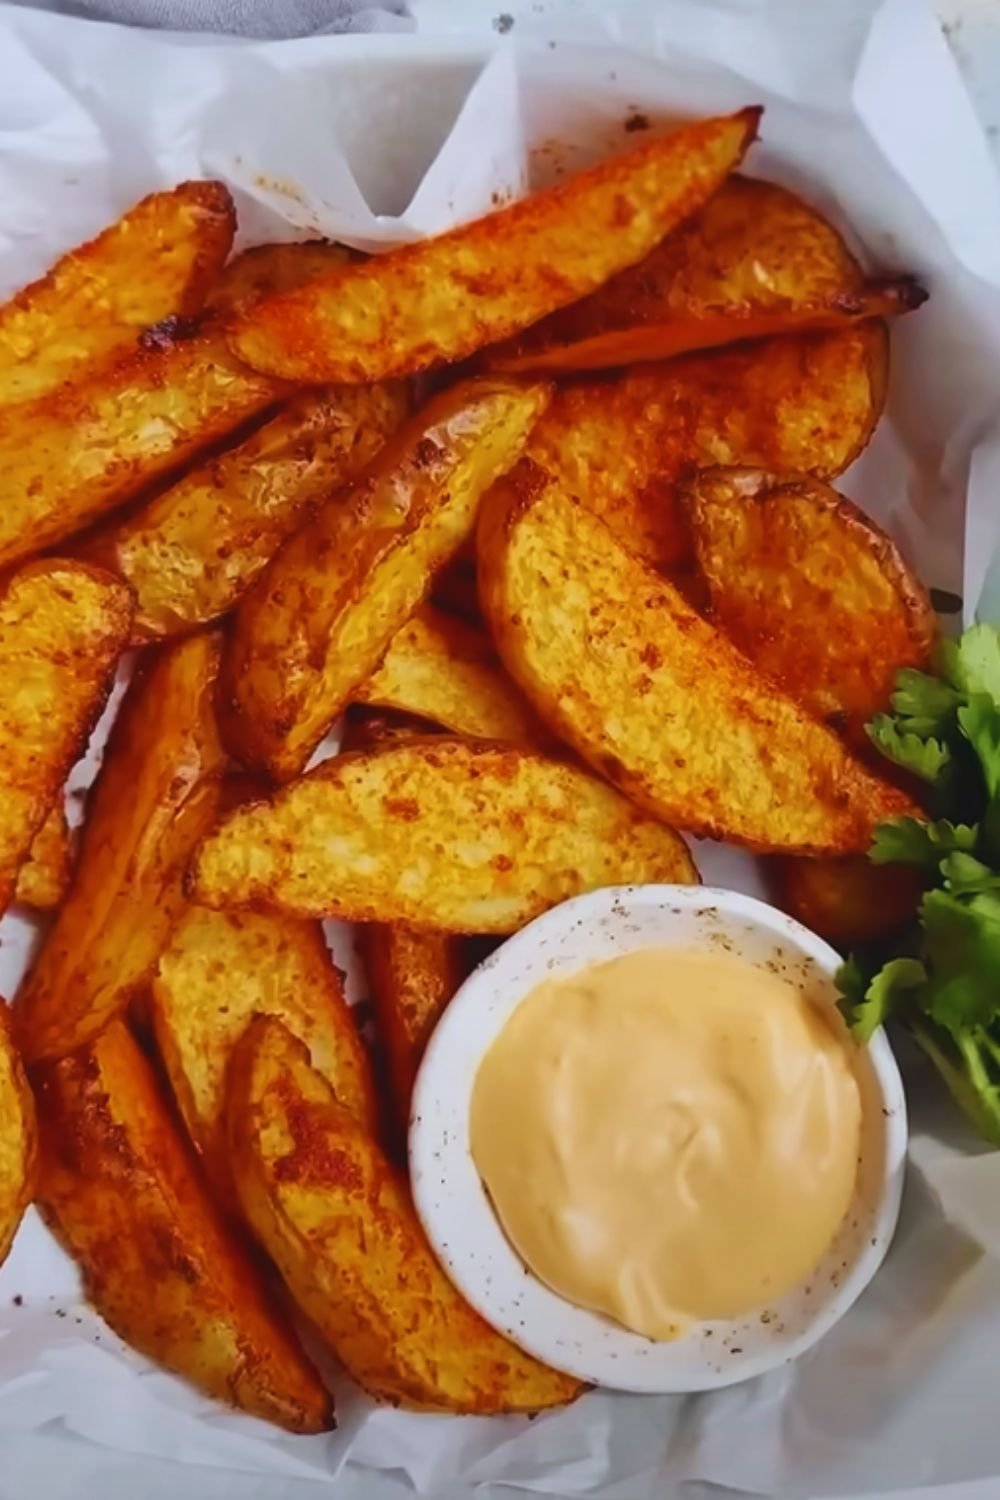
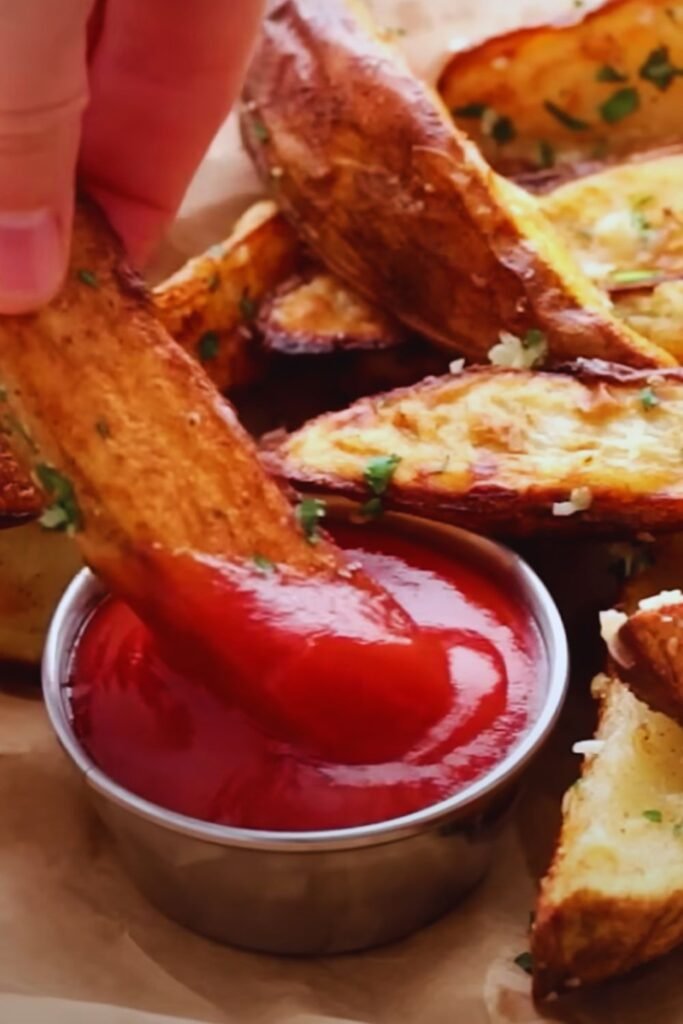
Delicious Dipping Sauces
The perfect potato wedge deserves an equally perfect dipping sauce. Here are some of my favorite homemade options that elevate these wedges to a whole new level:
Classic Garlic Aioli
- 1/2 cup mayonnaise
- 3 cloves garlic, minced or pressed
- 1 tablespoon fresh lemon juice
- 1/4 teaspoon salt
- Pinch of black pepper
Mix all ingredients together and refrigerate for at least 30 minutes before serving to allow flavors to meld.
Spicy Sriracha Mayo
- 1/2 cup mayonnaise
- 2-3 tablespoons sriracha sauce (adjust to taste)
- 1 teaspoon lime juice
- 1/4 teaspoon garlic powder
Whisk all ingredients together until smooth. Adjust sriracha to your preferred spice level.
Honey Mustard Dip
- 1/4 cup Dijon mustard
- 3 tablespoons honey
- 1 tablespoon mayonnaise
- 1 teaspoon apple cider vinegar
Mix all ingredients until well combined. For a smoother texture, use a whisk.
Truffle Mayo
- 1/2 cup mayonnaise
- 1-2 teaspoons truffle oil (to taste)
- 1/4 teaspoon garlic powder
- Pinch of salt
Combine all ingredients, starting with the smaller amount of truffle oil and adding more to taste.
Serving Suggestions
These crispy potato wedges can stand alone as a snack or appetizer, but they also make the perfect side dish for countless meals. Here are some of my favorite pairings:
- Serve alongside a juicy burger or grilled chicken sandwich
- Pair with a protein-packed grain bowl for a hearty lunch
- Offer as part of a game day spread with various dipping sauces
- Serve with baked or grilled fish for a lightened-up fish and chips experience
- Add to a breakfast plate as an elevated alternative to hash browns
- Include in a family-style dinner with roasted meats and vegetables
- Offer as a crowd-pleasing side at your next barbecue
- Serve with a fresh salad for a balanced meal
For a refreshing beverage pairing, try:
- Sparkling water with citrus
- Iced tea with lemon
- Homemade lemonade
- Kombucha
- Cold-brewed coffee
- Fresh fruit smoothies
Nutritional Information
For those watching their nutritional intake, here’s an approximate breakdown for a serving of these roasted potato wedges (based on the basic recipe, with each potato yielding about 2 servings):
| Nutrient | Amount per Serving |
|---|---|
| Calories | 220 |
| Total Fat | 7g |
| Saturated Fat | 1g |
| Cholesterol | 0mg |
| Sodium | 290mg |
| Total Carbohydrates | 36g |
| Dietary Fiber | 3g |
| Sugars | 2g |
| Protein | 4g |
| Vitamin C | 45% DV |
| Potassium | 20% DV |
| Iron | 8% DV |
This nutritional profile makes these wedges a much healthier alternative to deep-fried potatoes. The oven-roasting method significantly reduces the fat content while preserving all the flavor and texture we love.
Tips for Feeding a Crowd
When I’m hosting a large gathering, potato wedges are one of my go-to sides because they’re economical, crowd-pleasing, and can be prepared in large batches. Here are my tips for scaling up this recipe:
- Plan on one medium-large potato per person (this allows for generous portions)
- Use multiple baking sheets rather than overcrowding one sheet
- Rotate the position of the baking sheets in the oven halfway through cooking
- Set up a “wedge bar” with various dipping sauces so guests can customize their experience
- If making very large quantities, consider par-baking all wedges early in the day, then finishing them in batches as needed
For the easiest service, I recommend setting up a buffet-style station with the wedges in a large, oven-safe serving dish that you can periodically refresh with hot batches from the oven.
FAQ: Everything You Need to Know About Potato Wedges
Over the years, I’ve been asked countless questions about making the perfect potato wedges. Here are answers to the most common queries:
Q: Do I really need to soak the potatoes? Yes, the soaking step is crucial for removing excess starch, which helps achieve maximum crispiness. However, if you’re truly pressed for time, you can skip it—just know that your wedges might not be quite as crispy.
Q: Can I use sweet potatoes instead of regular potatoes? Absolutely! Sweet potato wedges are delicious but cook a bit differently. They tend to caramelize and brown faster due to their higher sugar content, so watch them carefully and consider reducing the oven temperature to 400°F (200°C).
Q: How do I know when the wedges are done? The perfect wedge should be deeply golden on the outside and easily pierced with a fork. If you’re uncertain, don’t hesitate to cut one open to check—the interior should be fully tender with no resistance.
Q: Can I make these in an air fryer? Yes! Air fryers work wonderfully for potato wedges. Cook them at 380°F (190°C) for about 15-20 minutes, shaking the basket halfway through. You might need to work in batches depending on your air fryer’s capacity.
Q: Why did my potatoes turn out soggy even though I followed the recipe? The most common culprit is overcrowding the pan. When potatoes are too close together, they steam rather than roast. Other possibilities include an inaccurate oven temperature or not drying the potatoes thoroughly enough after soaking.
Q: Can I freeze potato wedges? Yes, but I recommend freezing them after they’ve been par-baked for about 20 minutes. Cool them completely, freeze in a single layer on a baking sheet, then transfer to a freezer bag. Bake from frozen at 425°F (220°C) for 15-20 minutes until crispy and heated through.
Q: Is it necessary to flip the wedges during baking? Flipping ensures even browning on all sides. If you’re short on time or feeling lazy, you can skip this step, but know that one side might be significantly more crispy than the other.
Q: How can I make these wedges lower in carbs? While potatoes are naturally high in carbohydrates, you can try using turnips, rutabagas, or jicama as lower-carb alternatives that roast up similarly. The technique remains the same, though cooking times may vary.
Final Thoughts
There’s something deeply satisfying about mastering a seemingly simple dish like potato wedges. What appears straightforward on the surface actually involves a beautiful dance of technique, timing, and temperature. When you get it right—achieving that perfect balance between crispy exterior and fluffy interior—it’s nothing short of culinary magic.
I hope this guide helps you create potato wedges that bring joy to your table. Remember that cooking is both science and art—follow the techniques I’ve shared, but don’t be afraid to experiment and make this recipe your own. The best dishes always carry a bit of the cook’s personal touch.
Whether you’re making these wedges for a quiet family dinner or a lively gathering of friends, know that you’re creating more than just food—you’re creating an experience. And that, to me, is what cooking is all about.